
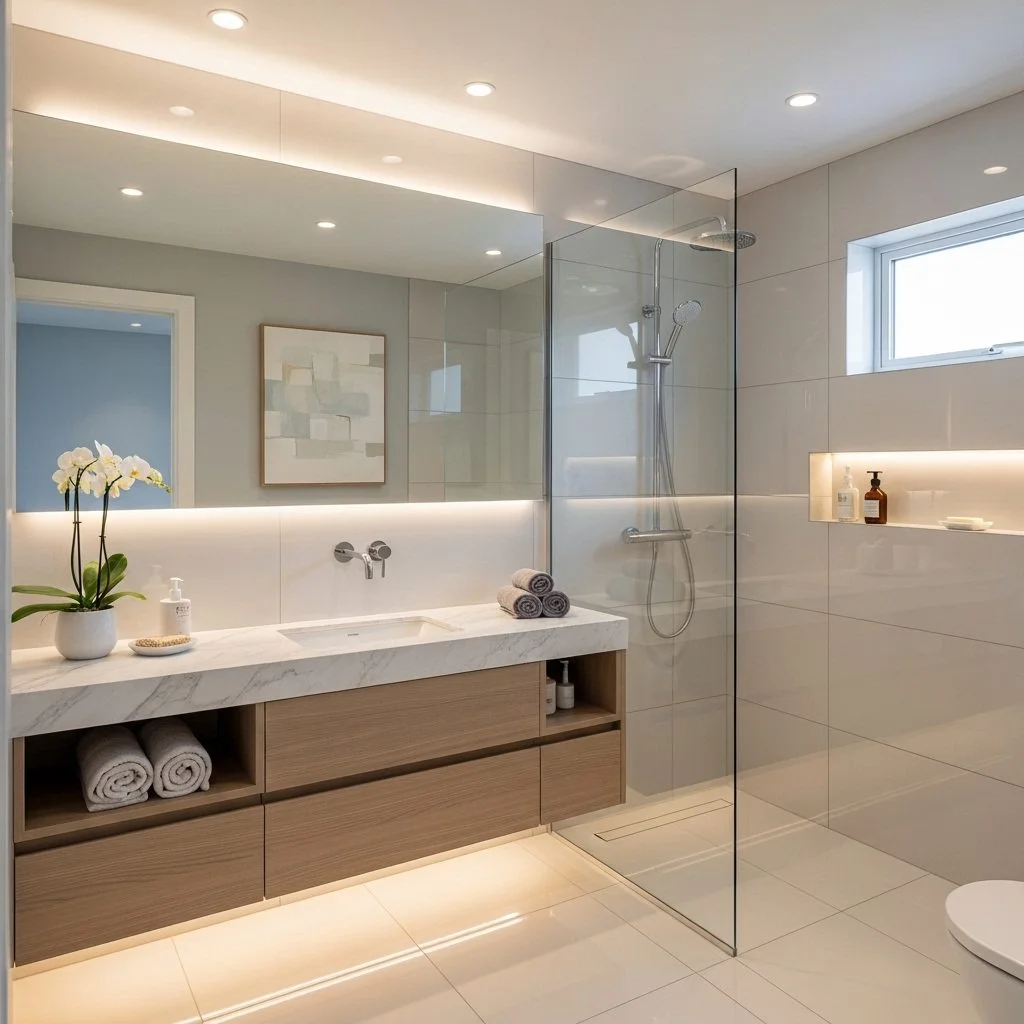
You step out of the shower and your elbow hits the towel bar. Again. The door has to be closed before you can reach the sink, and the counter holds exactly one toothbrush cup. If that sounds familiar, you probably have a small bathroom, not a bad one.
Most small bathrooms feel tight for fixable reasons. Dark corners, a solid-front vanity, a curtain that slices the room in half, and a crowded counter all add up. Square footage is rarely the real culprit.
These 24 ideas run from easiest to hardest. The first dozen need little more than a drill, a paint roller, or an afternoon. The later ones involve a plumber, a tile setter, or an open wall. Start at the top and work down until the room stops fighting you. Each idea notes the effort involved and the measurements that matter.
Keep Countertops Clean and Minimal
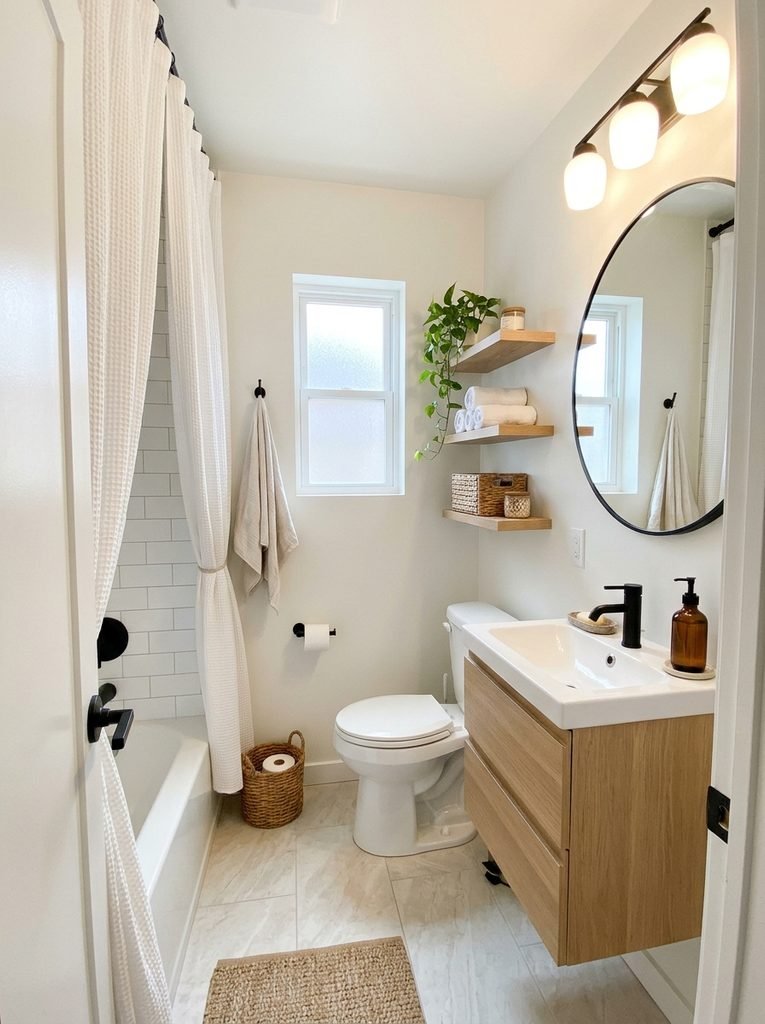
Effort: five minutes, then a weekly reset. Counter space is the cheapest square footage you own. Try a three-item rule: a soap pump, one small tray, and one living thing such as a plant. Everything else goes into a drawer or a lidded basket. A toothbrush cup, a razor, and four skincare bottles can eat half of a 20-inch vanity top. Clear them, and the mirror and faucet become the focal point instead of the clutter. For drawer-level organizing, see our guide to small bathroom storage ideas that free up counter space.

Add Indoor Plants
Effort: one trip to a garden center. Plants soften the hard edges of tile, glass, and chrome. Choose for the light you actually have. A snake plant tolerates dim corners, pothos trails happily from a high shelf, and ferns love steam but need a bright window. A bathroom with no window at all needs a faux plant or a small grow light. Pothos and snake plants are toxic to cats and dogs, so keep them out of reach. One healthy plant on a wall shelf beats three crowded onto the vanity.

Let Natural Light Flow In
Effort: twenty minutes. Take down heavy curtains and blinds that cover the window. Replace them with a sheer panel, or apply frosted privacy film straight to the glass. Film keeps the daylight and blocks the view from next door. Trim any shrubs outside that shade the window. Then clear the sill of bottles and soap dishes, because a lined-up row of objects breaks up the glow. Even a small window gives the room a sense of sky, and that makes walls feel farther away.

Use Large Mirrors to Reflect Light
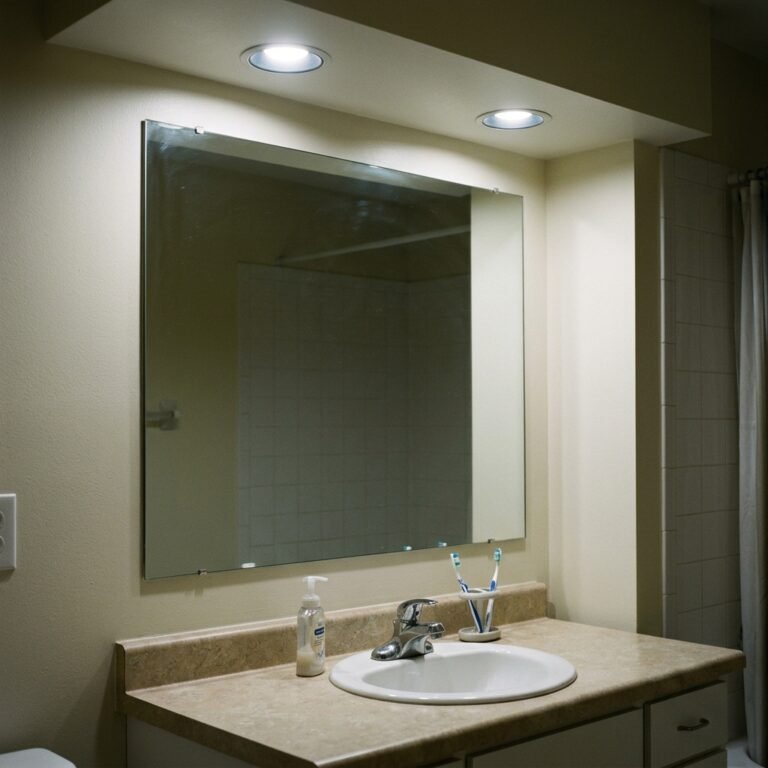
Effort: one hour, plus a stud finder. Aim for a mirror as wide as the vanity, or within a few inches of it. A 24-inch mirror above a 36-inch vanity looks like an afterthought. Hang it so the bottom edge sits a few inches above the faucet. If the layout allows, place it opposite the window so it doubles the daylight. Large glass is heavy. Anchor it into studs or use wall anchors rated for the weight, and never trust a single adhesive strip.

Install Tall Vertical Mirrors
Effort: one hour. A tall mirror works as a second mirror, not a replacement. Think of a rectangle about 24 inches wide and 60 to 70 inches tall. Mount it beside the vanity or on the back of the door. It stretches the walls upward and shows you a full outfit, which a vanity mirror never does. Leaning mirrors can tip, so add an anti-tip bracket, especially in homes with kids. Avoid placing it where it faces the toilet directly.

Choose Light and Neutral Colors
Effort: one weekend. The goal is not white everywhere. Light colors with a touch of warmth, such as greige, soft cream, or pale sage, flatter skin better than stark white. Check the paint’s Light Reflectance Value, which most brands print on the swatch or color page. In a room with little daylight, look for roughly 60 or higher. Use a satin or semi-gloss finish labeled for humid rooms. Flat paint stains easily and invites mildew near the shower.

Try a Monochrome Color Scheme
Effort: one weekend. A monochrome room stays inside one color family and varies the depth. Paint the walls one shade, then choose towels a step deeper and a rug or stool in the darkest tone. The eye reads one calm picture instead of five competing pieces. Texture keeps it from feeling flat. Mix waffle towels, a woven basket, and ribbed glass. Add one metal finish only. Three tones of greige with brushed brass looks intentional. Three tones plus chrome, gold, and black does not.

Improve Lighting for Brightness
Effort: one weekend, plus an electrician for new wiring. Layer three sources. Use a ceiling fixture for general light, two sconces beside the mirror, and a night light or toe-kick glow for late trips. Many designers center sconces at roughly 60 to 66 inches from the floor, near eye level. That lights the face evenly and kills the shadows a single overhead bulb creates. Choose bulbs between 2700K and 3000K with a color rendering index of 90 or higher. Check each fixture’s label for a damp or wet rating, and use wet-rated ones inside the shower.

Create a Spa-Like Atmosphere
Effort: one shopping trip. A spa feel comes from repetition, not extras. Buy one set of towels in a single color. Fold or roll them the same way every time. Space the hooks evenly. Then add one scent, one natural material such as a wooden tray or stone dish, and one soft light. Skip the five-bottle collection. Run the exhaust fan during every shower and for about twenty minutes afterward. Lingering steam, not clutter, is what turns a spa mood into a damp one.

Use Floating Shelves Above the Toilet
Effort: one hour, plus a stud finder. The wall above the tank is usually empty. Install two shelves about 6 to 8 inches deep. Keep the lowest shelf around 12 inches above the tank so the lid can lift for repairs. Put folded towels and one lidded basket on the lower shelf and a single decorative piece on top. Screw brackets into studs, since towels are heavier than they look. Closed baskets hide spare toilet paper, which spares you a visual mess at eye level.

Use Open Shelving
Effort: one hour. Open shelves work best where you reach for things daily, such as beside the mirror or near the shower. The trick is restraint. Leave about a third of every shelf empty. Limit yourself to three materials, for example white towels, glass jars, and one wooden tray. Decant cotton swabs and cotton rounds into matching jars. A shelf that looks styled takes ten seconds to tidy. A shelf that looks stuffed takes ten minutes, and you will stop doing it within a week.

Use Vertical Storage Solutions
Effort: one afternoon. When floor space runs out, build up. A slim tower 8 to 10 inches deep and 60 to 72 inches tall fits between the toilet and the wall. It holds more than a vanity drawer and barely shows from the doorway. Wall-hung versions keep the floor visible underneath, which helps the room feel larger. Anchor any tall unit to the wall to prevent tipping. Put the items you use daily at chest height and backups on the top and bottom shelves.

Add Decorative Lighting Fixtures
Effort: one weekend, plus an electrician for new wiring. Swapping one fixture for another is often a one-hour job. Turn the power off at the breaker first. A brass or matte black sconce gives a plain wall some personality. Choose a glass or frosted shade so the bulb does not glare in the mirror. Keep pendants away from the shower spray zone. Pick fixtures sized to the room, because an oversized chandelier in a 5-by-8-foot bathroom crowds the ceiling. Look for a damp-rated label, which is the minimum for most bathroom spots.

Use LED Mirrors for Functional Lighting
Effort: one weekend. A backlit mirror replaces a pair of sconces and a mirror in one piece. Decide first whether it plugs in or hardwires. Plug-in models need a nearby GFCI outlet and leave a cord visible. Hardwired models look cleaner but need an electrician. Look for adjustable color temperature, a built-in defogger, and a color rendering index near 90. Size the mirror to the vanity width, just as you would a regular one. The edge glow also works as a soft night light.

Use Reflective Surfaces to Amplify Light
Effort: varies by surface. Glossy wall tile, a mirrored cabinet door, and polished chrome all bounce light around the room. Keep shine on the walls and fixtures, not the floor. Glossy floor tile turns slick when wet. Choose floor tile with a wet slip rating, and look for a DCOF of 0.42 or higher on the spec sheet. Polished chrome shows water spots quickly, while brushed nickel hides them. A little shine goes a long way. Two or three reflective moments feel luminous, and ten feel like a hall of mirrors.

Install Glass Shower Doors
Effort: professional install, about one day. A clear glass panel lets the eye travel to the back wall, so the room reads as one space. Ask for low-iron glass, which avoids the green tint of standard glass. Frameless panels are usually 3/8 inch thick. A fixed panel with a short door often costs less than a full enclosure and still keeps the view open. Do not shrink the shower to fit. NKBA recommends an interior of at least 36 by 36 inches, while code allows 30 by 30. On a tight budget, hang a clear liner and a light curtain from a rod near the ceiling.

Use Wall Mounted Faucets
Effort: professional, done while the wall is open. A wall-mounted faucet needs an in-wall valve and rough-in, so plan it before tile goes up. It frees the back few inches of the counter, which is precisely where soap and toothbrushes pile up. Choose a spout long enough to reach the center of the basin. Pair it with a deep or wide basin so water lands in the bowl, not on the wall. This setup suits a vessel sink or a wide rectangular basin best. It rarely suits a tiny round one.

Install Floating Vanities
Effort: professional, or a confident DIYer. A wall-hung vanity leaves roughly 6 to 12 inches of visible floor beneath it, and that open floor reads as extra room. The wall needs solid blocking or reinforced studs to carry the weight. Mount the countertop at 34 to 36 inches. In a narrow room, pick a depth of 16 to 18 inches instead of the standard 21. Choose drawers over doors, and ask for a cutout that works around the plumbing. A low LED strip underneath doubles as a night light.

Choose Compact Fixtures for Better Flow
Effort: professional. Compact does not mean cramped. A round-front toilet bowl runs about two inches shorter than an elongated one. A wall-hung bowl with an in-wall tank takes even more off the projection. A narrow-depth vanity gives back several inches of walkway. Even so, clearance rules still apply. The National Kitchen & Bath Association’s planning guidelines recommend the toilet centerline sit at least 18 inches from a side wall or fixture, though many codes allow 15. Measure that centerline before you buy.

Install Recessed Wall Niches
Effort: renovation, done at the tile stage. A niche sits between wall studs. With studs 16 inches apart on center, the opening is about 14.5 inches wide. In a standard 2×4 wall, it is about 3.5 inches deep. That is enough for shampoo and conditioner bottles standing upright. Avoid exterior walls, which are colder and insulated. Waterproof the interior with a membrane, and slope the bottom slightly toward the shower so water drains. A shower niche replaces the wire caddy that swings, rusts, and crowds the corner.

Add Built-In Cabinets
Effort: carpenter or experienced DIYer. A built-in is a cabinet framed into an alcove or a corner so its face sits flush with the wall. A 12-inch-deep tower holds a surprising stack of towels. Paint it the wall color so it fades from view. Use moisture-resistant materials such as PVC board or sealed marine plywood, and seal every cut edge. Push-to-open latches remove the handles that snag sleeves in a tight room. The result looks like architecture, not furniture.

Choose Large Floor Tiles
Effort: renovation. A 12-by-24-inch tile means fewer grout lines and a calmer floor. Run the long side along the longest wall to stretch the room. Pick a grout joint of about 1/8 inch in a color close to the tile. Large tiles show an uneven subfloor, so ask the installer to check flatness first. Order 10 to 15 percent extra for cuts, since small rooms involve many of them. Match the floor tile to the shower floor where you can, which also removes a visual break.

Install a Corner Sink
Effort: plumbing work. A corner sink earns its place only when the door arc and toilet leave no other option. It suits a guest powder room far better than a family bathroom, because it gives up counter and storage. Check that the corner is free of pipes and vents first. Pick a compact wall-hung basin with a slim faucet. Still choosing where everything goes? Our guide to small bathroom layouts compares single-wall, galley, and corner plans.

Use Sliding or Pocket Doors
Effort: the biggest job on this list. A swinging door sweeps a quarter circle of floor that nothing else can use. A pocket door removes that arc by sliding into the wall. The cavity must be free of pipes, wiring, and vents, and the wall needs about twice the door’s width. NKBA suggests a 32-inch clear opening for entry doors. A surface-mounted barn door is cheaper but leaves gaps, so privacy and sound suffer. An outswing door is another option if the hallway can handle it.

Conclusion
You do not need to tackle all 24 small bathroom ideas. Start with the free ones: clear the counter, open the window, and hang a mirror that matches the vanity. Then fix the light and the color. Those four moves change the room more than most renovations do. Save the pros for last. Floating vanities, glass, and pocket doors repay their cost once the basics are in place. Measure twice, mind the clearances, and let the room breathe.
2 comments