
You are rinsing a pot at the sink when your eye lands on the last cabinet in the run. Its exposed side is raw veneer with a visible seam and a faint grease line at hand height. The cabinets are fine. The counters are fine. That one panel is why the room still looks like a rental.
Most kitchen decor advice stops at what sits on the counter. The details that make a kitchen look finished are usually small and structural: an edge, a gap, a seam, a cover. They cost less than a new faucet, and they get noticed more than you would expect, because nobody has styled them yet.
These eleven ideas target the spots people skip. Each comes with sizes, rough costs, and the mistake that spoils it. Start with whichever one you can see from where you are standing right now.
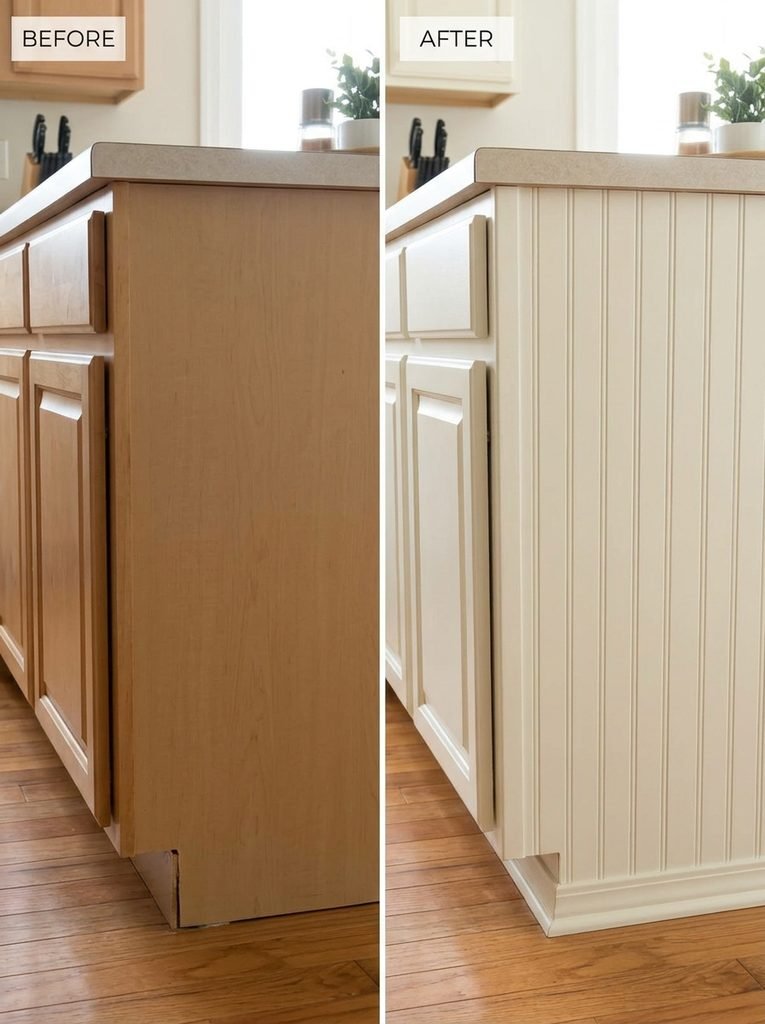
Cabinet End Panels That Finish the Run
Builder-grade kitchens often leave the exposed end of a cabinet run as a flat, unfinished slab. A panel fixes it in an afternoon.
Cut a quarter-inch panel of beadboard, fluted plywood, or plain birch plywood to the cabinet’s full end. A standard base cabinet is about 24 inches deep and 34½ inches tall, so measure yours anyway. Floors are rarely level, so scribe the bottom edge to the floor line or hide the gap with a strip of base shoe. Glue the panel on with construction adhesive and hold it with painter’s tape until it grabs. Caulk the edges, then prime with a bonding primer and finish with cabinet-grade satin enamel.
Match the cabinet color if you want the run to look custom. Go one shade deeper if you want the panel to read as a deliberate accent. Budget roughly $30 to $70 for the sheet and $25 to $50 for paint, per end.
The common mistake is skipping the primer. Satin enamel peels off glossy or laminate surfaces within a few months if nothing bonds it first.
The Gap Above the Upper Cabinets
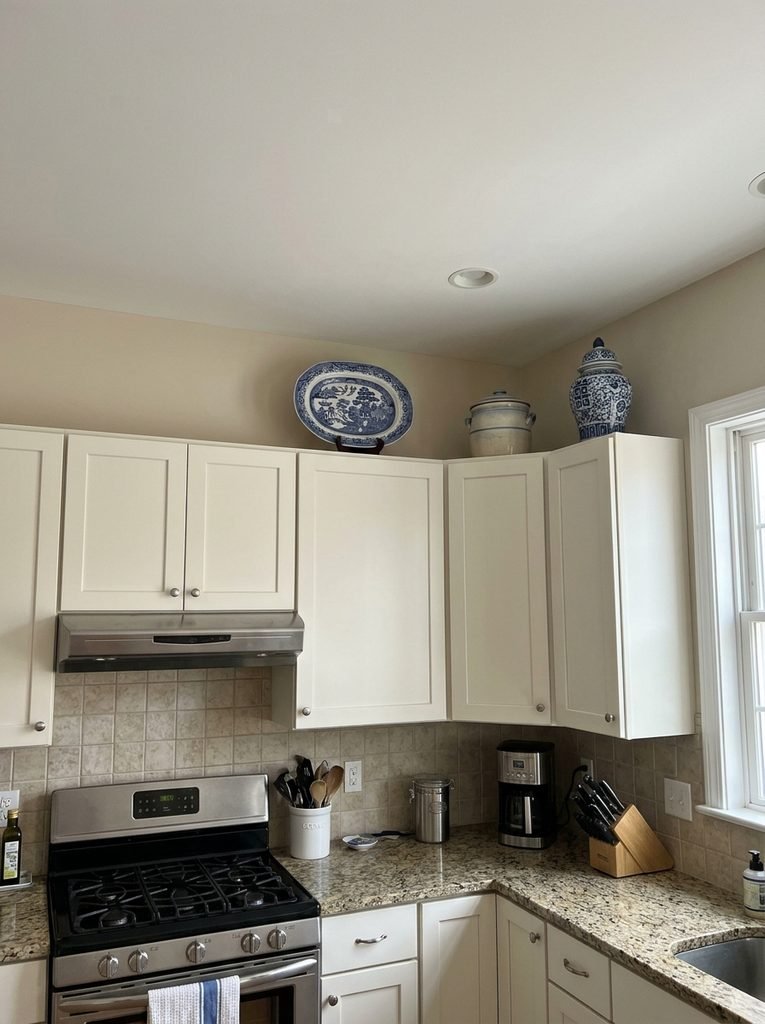
Do the math on your own kitchen. Upper cabinets are normally hung with their bottoms at 54 inches. In a room with an 8-foot ceiling and 30-inch uppers, that leaves a 12-inch band above them. It is decor space, and it is also a dust shelf.
Three pieces beat ten. Use one large item, such as a 16-inch platter on a small stand. Add one medium item, like a lidded ceramic crock, and one tall item, like a ginger jar. Keep them in the same two colors. Glazed ceramic and metal wipe clean. Skip wicker, dried stems, and fabric, which soak up cooking grease and are miserable to clean.
Leave the stretch above the range empty. The National Fire Protection Association’s cooking safety guidance says anything that can catch fire belongs away from the stovetop, and that includes paper items and baskets.
If your gap is under about 8 inches, nothing will sit well there. Run crown molding to the ceiling instead.
A Doorway Casing Painted Deeper Than the Walls
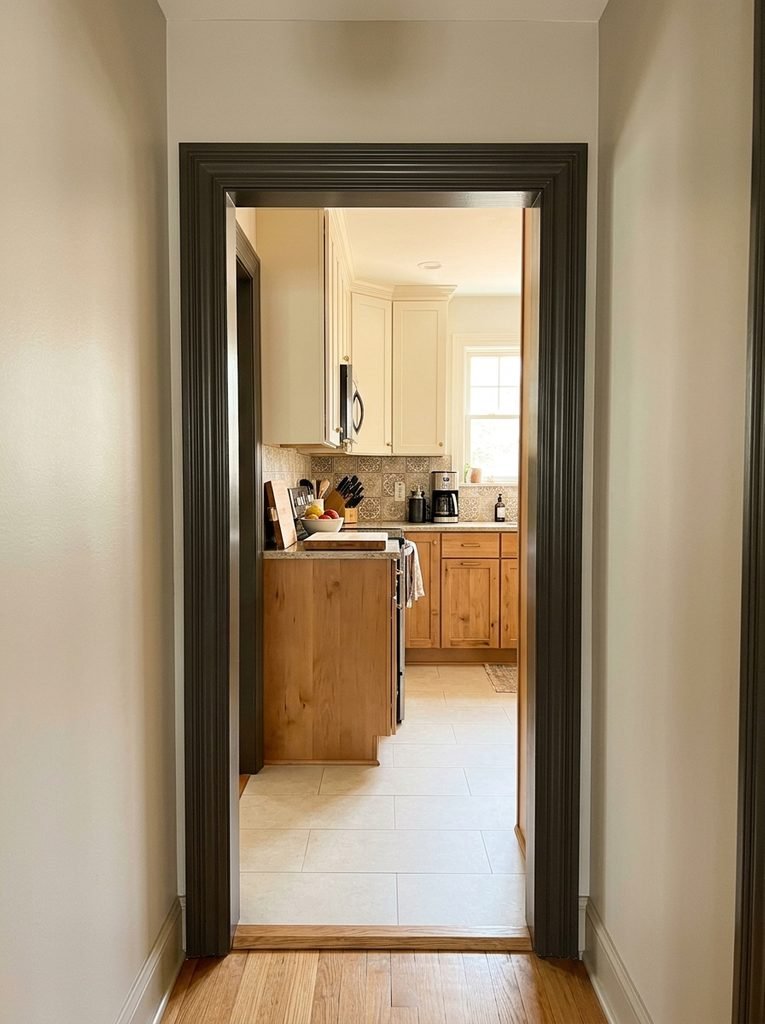
Stand in the hallway and look into the kitchen. Before you see a single counter, you see the door casing. White casing against a white wall is invisible. The same casing in a deeper color frames the room like a picture mat.
Choose a color two or three shades deeper than the wall: a mid-green against pale sage, or a warm charcoal against greige. Casing is usually 2¼ to 3½ inches wide, so a quart covers it twice over. Paint the face, the inside jamb, and the door edge in the same color, or the casing will look like a stripe.
Prep matters more than color. Caulk the seam between casing and wall first, because a cracked caulk line shows up sharply against dark paint. Sand lightly with 220-grit, tape the wall, and apply two coats of semi-gloss with a 2-inch angled brush.
Where the Backsplash Ends
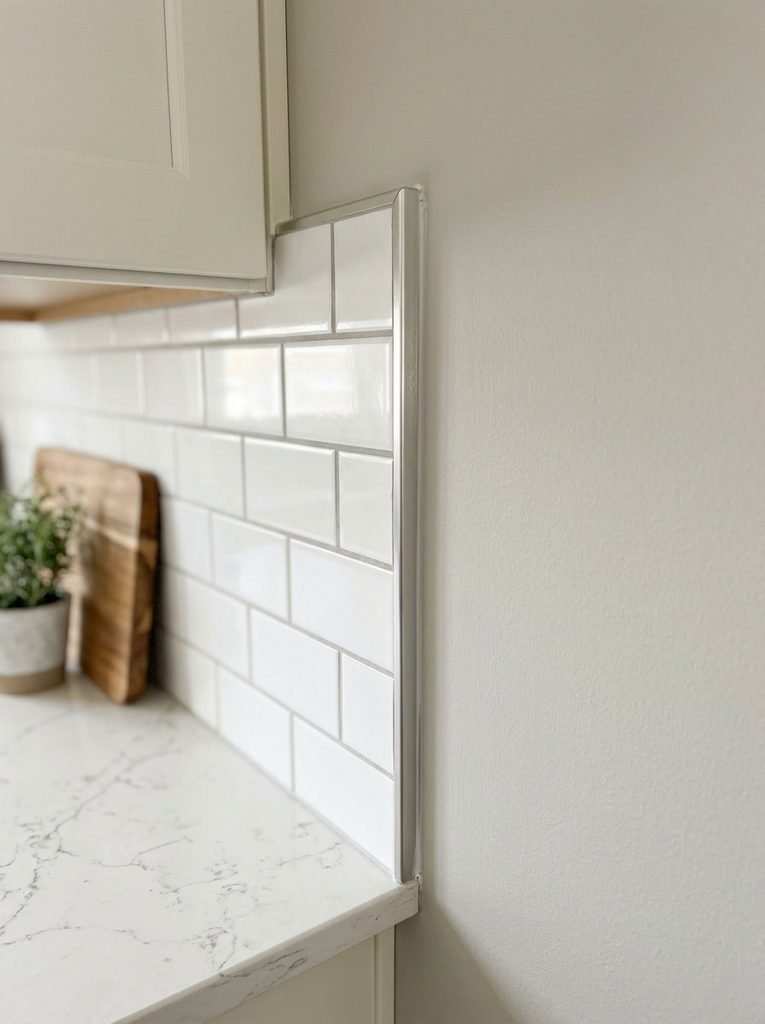
Look at where your tile stops. On many kitchens it simply ends at the side of the counter run, leaving a raw edge, a ridge of thinset, or a sharp glazed cut.
If you are planning new tile, ask the installer for a metal edge profile or bullnose pieces on every exposed edge. A basic aluminum or stainless profile runs about $10 to $25 for an 8-foot stick. Solid brass costs several times that. If the tile is already up, bond a slim strip of paint-grade wood or metal L-trim over the edge with construction adhesive, then caulk the seam.
Another fix is to carry the tile three to four inches past the last cabinet, or up to the underside of the uppers, so it looks like it has a reason to stop. For bigger tile decisions, our guide to kitchen backsplash ideas that give a basic kitchen a custom look goes into patterns and layouts.
A Small Mirror Across From the Window
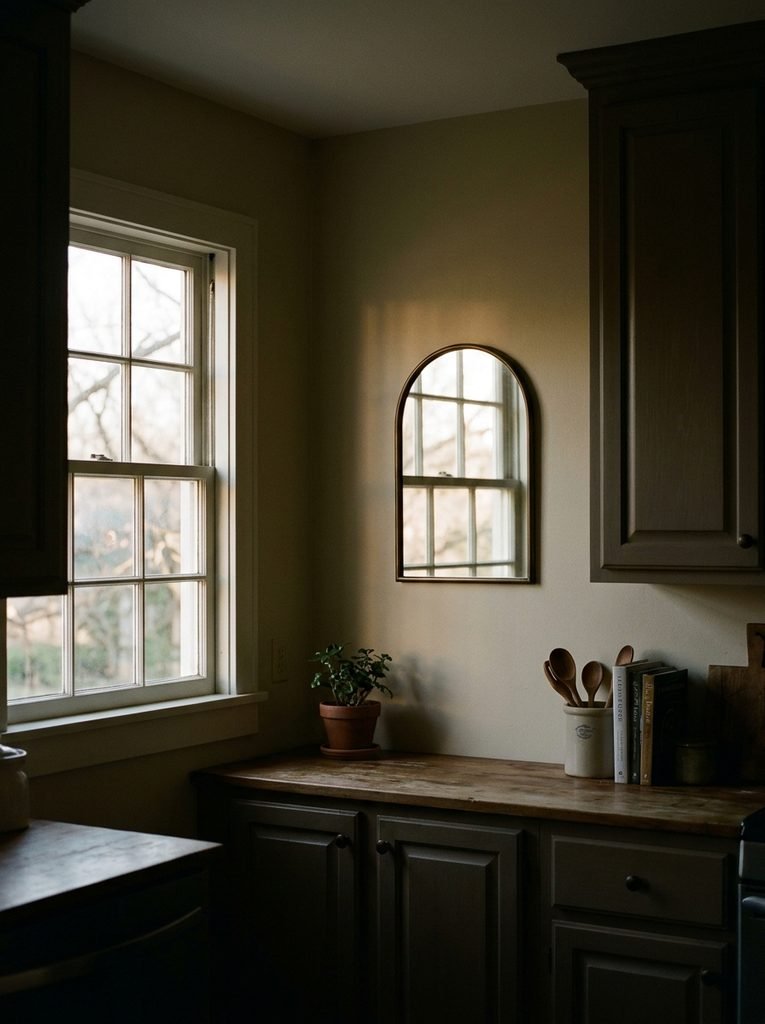
A kitchen with one window and a dark far corner feels dim by four in the afternoon. A mirror on the wall opposite, or at right angles to the window, sends daylight back into the room.
Choose a round or arched mirror between 14 and 20 inches. Hang it with its center near 60 inches from the floor. Pick one with a sealed edge and moisture-resistant backing, and keep it about three feet from the sink and burners so it stays out of the splatter zone. Cut a paper template, tape it to the wall, and watch it for a day before you drill.
The mistake to avoid is a mirror that reflects the trash bin, the open dishwasher, or the hood vent. Stand where you actually cook and look at what the glass shows you. Also check the late-day glare, because a direct sun bounce into your eyes at the stove is no fun.
The Back of the Island
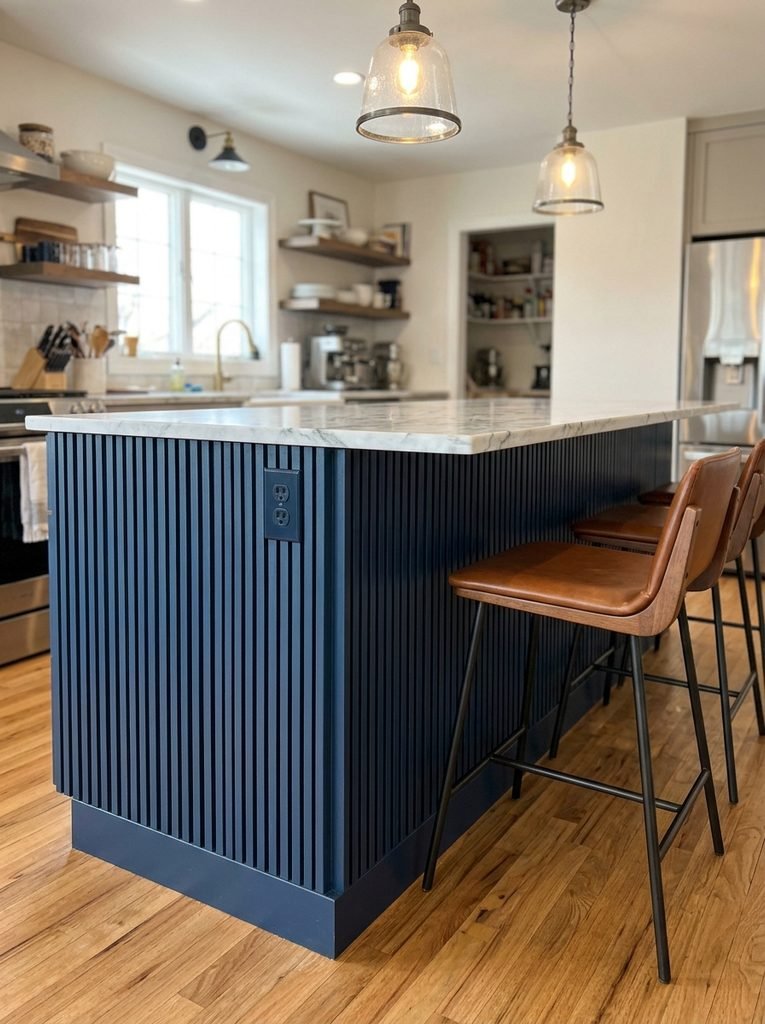
The seating side of an island is the side guests see most, and it is often a flat run of the same cabinet door as the working side. Panel it.
Quarter-inch fluted or slatted panels, glued to the cabinet back and painted, give the island a furniture look. Use scuff-resistant satin or semi-gloss paint, since stool feet and shoes kick the lower eight inches constantly. Many designers allow roughly 12 to 15 inches of overhang for knee space at counter-height seating, so leave that zone clear.
Check for outlets before you start. Cut the panel to fit around any receptacle, and never glue over one. A stray panel hiding a working outlet is the kind of mistake you discover the day you try to plug in a mixer.
A Towel Landing Spot That Is Not the Oven Door
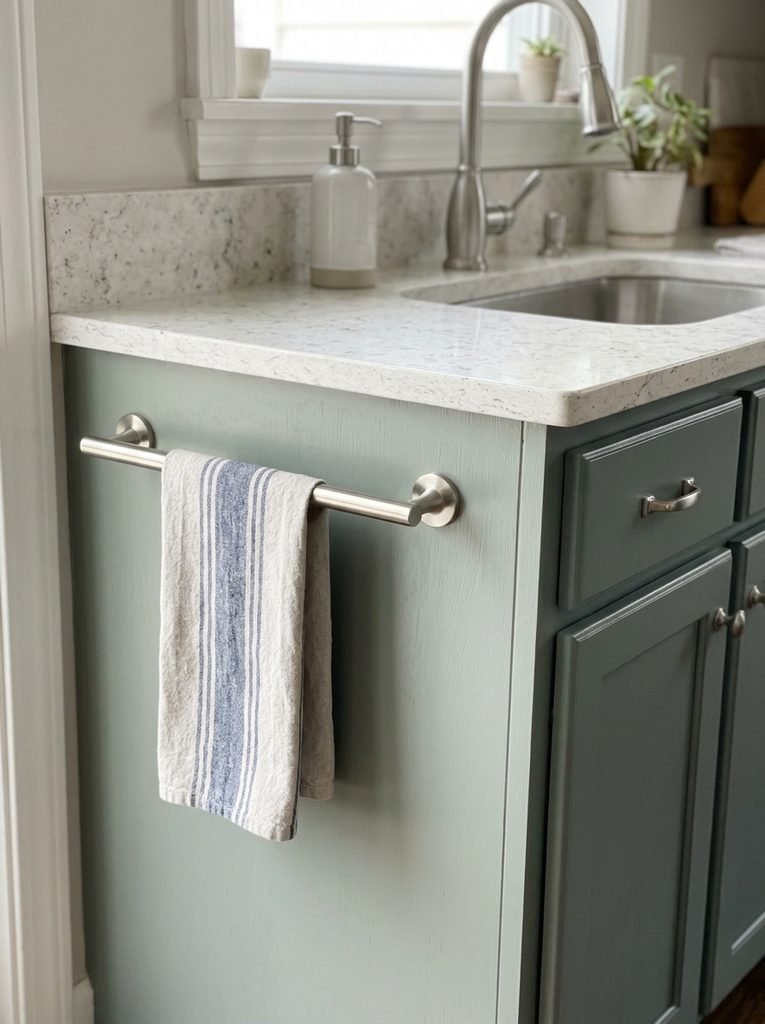
A dish towel draped over the oven handle covers the one piece of hardware built to look good, and it puts cloth right next to the burners. NFPA’s cooking safety tips list towels among the things to keep clear of the stovetop.
Give the towel a home at the sink instead. Mount a 12-inch brushed rail on the side of the cabinet nearest the sink, four to six inches below the counter edge so the towel hangs against the cabinet side and not over the drawer fronts. If you added an end panel earlier, screw the rail through the panel into the cabinet frame, not into the quarter-inch sheet alone.
No exposed side available? A narrow rail on the inside of the sink-base door hides the towel entirely.
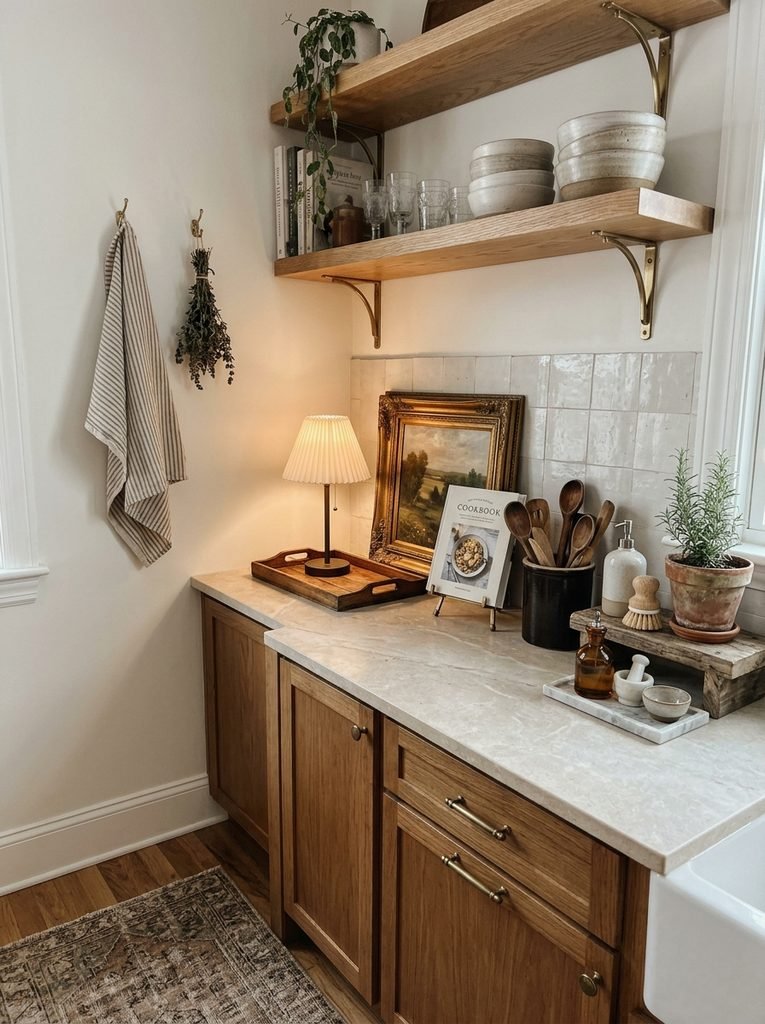
A Cookbook Stand Within Reach
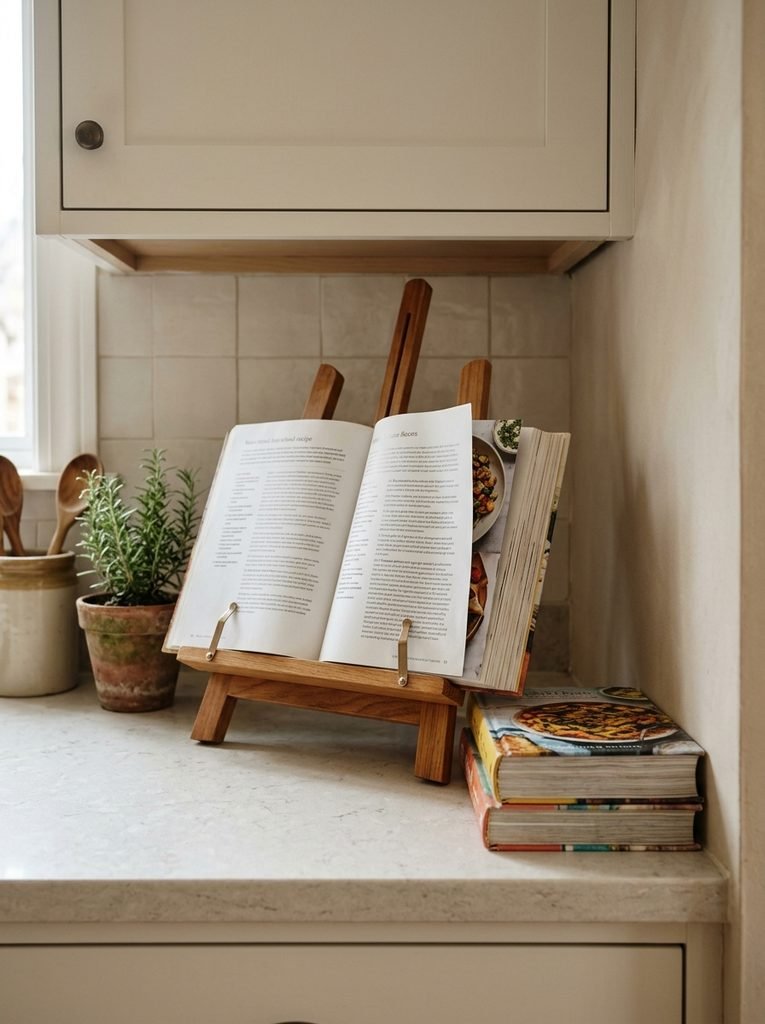
Cookbooks are the one kind of clutter that looks good if you keep it small. Pick the three you actually cook from and give them a stand.
A wooden or acrylic easel holds a cookbook open at a readable angle. Most cookbooks run about 9 by 11 inches, so they fit comfortably in the 18-inch gap between counter and uppers. Put the stand at the end of a counter run, away from the sink and burners, since splashes warp pages quickly.
Rotate the three books with the seasons. Braising books come out in November, and the grilling one goes to the shelf. It costs nothing, and the counter always looks recently used.
The Bin Spot
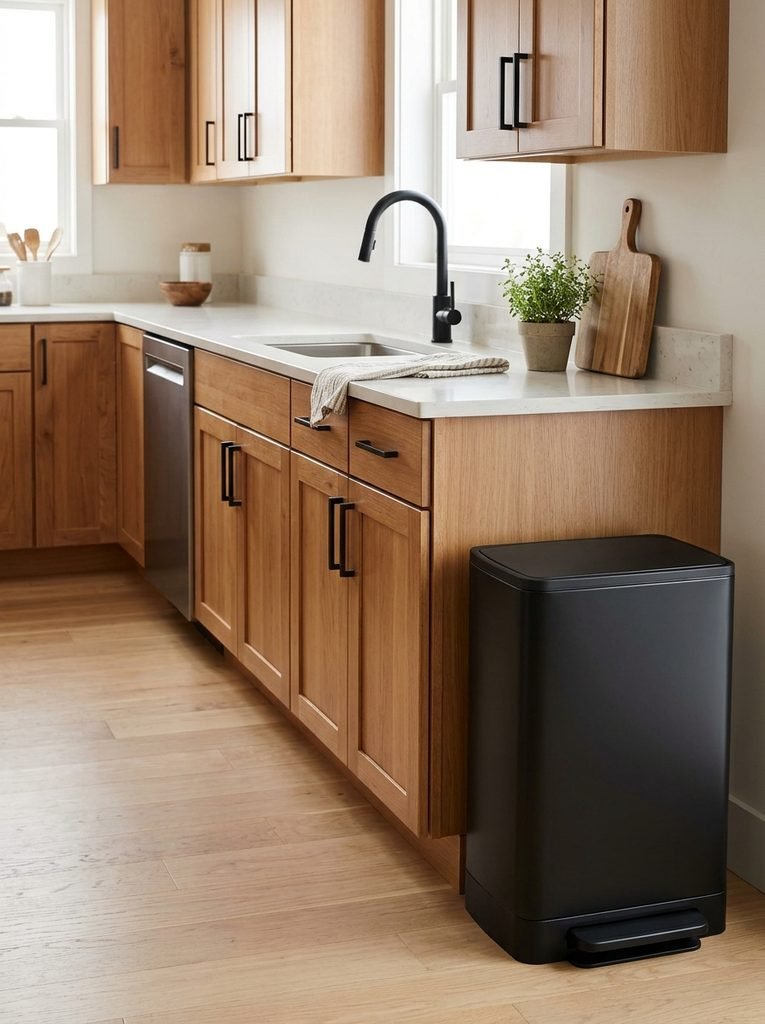
You chose your faucet, your hardware, and your pendant. Did you choose your trash can? Most people inherit whatever was in the last kitchen.
Pick one freestanding bin in a finish that matches something already in the room: brushed stainless to match the fridge, or matte black to match the faucet. Most standard bins take 13-gallon kitchen bags, so look for one sized for those. Tuck the bag edge inside the rim, or use a bin with a liner ring.
Placement is the part people miss. Keep the bin at the end of a cabinet run, not inside the dishwasher’s door swing, which is roughly 24 inches deep when open. If you step around the bin every time you unload dishes, the bin is in the wrong place.
Floor Registers That Match the Kitchen
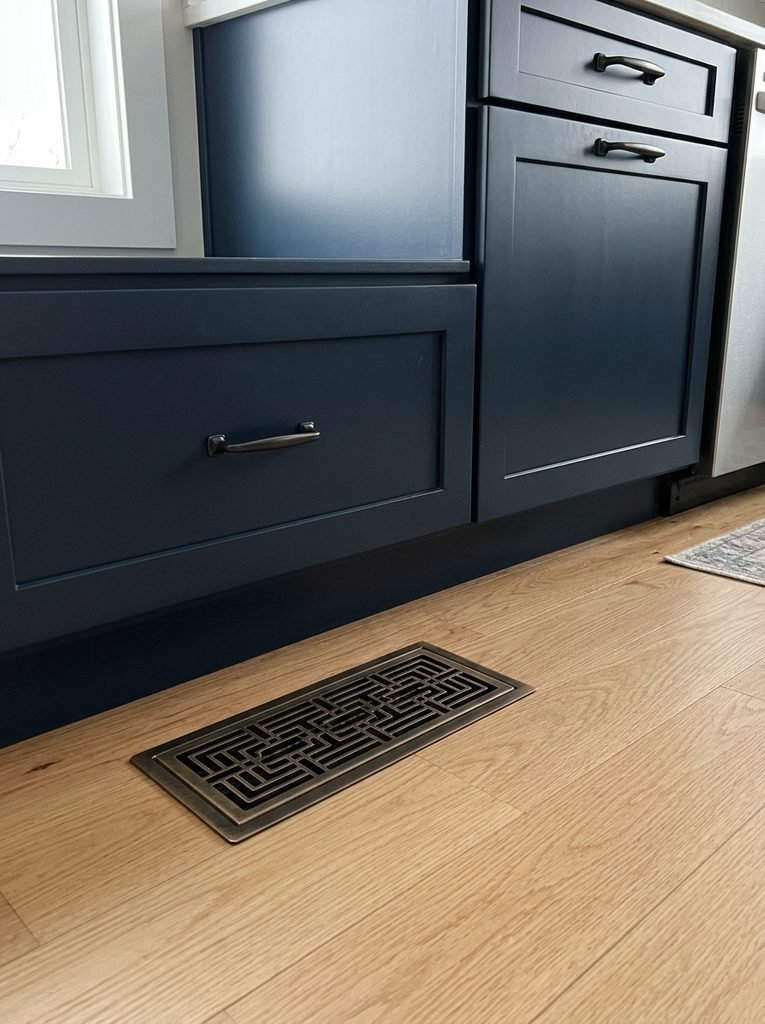
The stamped white or brown metal register in the floor is one of the least-thought-about objects in the room. It is also one of the cheapest to replace.
Measure the duct opening, not the cover. Common sizes are 4 by 10 and 4 by 12 inches, and the visible faceplate runs about an inch and a half larger in each direction. Order by the opening size, or the cover will not seat.
Choose metal for kitchens. Solid wood registers look good in a dining room but swell and warp under mopping. Brushed brass, black steel, and brushed nickel all work, and a good one costs $15 to $60. Match the finish to your cabinet hardware, not your faucet, since you will see the register and the pulls in the same glance.
Fresh Caulk Where Counter Meets Wall
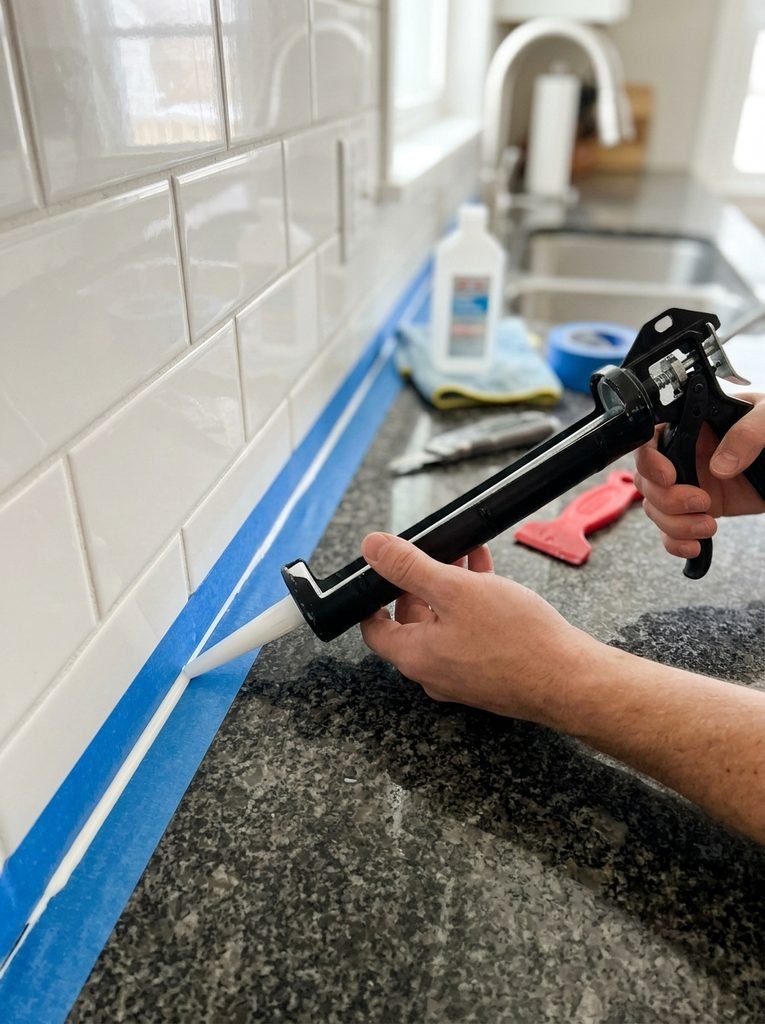
Yellowed, cracked, or gray-speckled caulk is the fastest way to make a new backsplash look dated. Replacing it costs $6 to $12 and about an hour.
Cut out the old bead with a utility knife and a caulk-removal tool. Wipe the joint with rubbing alcohol and let it dry. Tape both sides of the seam. Use kitchen-and-bath silicone near the sink, and siliconized paintable acrylic latex elsewhere. Run a bead about an eighth of an inch wide, smooth it with a damp fingertip, and pull the tape before the surface skins over. Let it cure a full 24 hours before wiping.
The mistake is caulking over old caulk. The new bead will not bond, and it will peel in a month.
A Saturday Order of Operations
You do not need to do all eleven. If you have one weekend, the sequence matters. Start with the caulk, since it is quick and everything painted afterward looks better against clean seams. Paint the doorway casing and the end panel next, because they share a trip to the hardware store and the same drying time. Swap the floor registers while the paint dries.
Save the mirror, the cookbook stand, and the bin for Sunday evening. Those take minutes. When you want bigger statement pieces, the ideas in 25 kitchen decor ideas that just hit different cover lighting, textiles, and styling at the room scale.
Frequently Asked Questions
Can you put decor on top of kitchen cabinets without it getting greasy?
Yes, if you choose glazed ceramic, metal, or lacquered wood. These wipe clean with a damp cloth every two to three months. Avoid wicker and dried flowers, which hold grease. Keep the area above the range empty. A 12-inch gap above 30-inch uppers fits three pieces without crowding.
How far should kitchen towels be from the stove?
Keep them off the range entirely. NFPA guidance says towels, oven mitts, and curtains should be kept away from the stovetop. In practice, hang towels at the sink side, at least one full cabinet width, about 18 to 24 inches, from the nearest burner.
What color should cabinet end panels be?
Match the cabinet color for a seamless built-in look. Go one shade darker if you want the panel to read as an accent. Use the same enamel and sheen as the doors, so the panel does not look like a patch under daylight or pendant light.
How do you measure a floor register for replacement?
Measure the duct opening, not the old cover. Take length and width in inches from the inside edge of the hole. Common sizes are 4 by 10 and 4 by 12. The faceplate sits about an inch and a half larger on each side, so buy by opening size.
How often should kitchen caulk be replaced?
Replace it when it cracks, yellows, pulls from the wall, or shows black spots, which often means mildew. Silicone commonly lasts several years, while acrylic latex fails sooner near sinks. A $6 to $12 tube and an hour of work resets the look of the whole backsplash.
2 comments