
You’re standing in a hardware store aisle with a borrowed drill, a landlord who has opinions, and exactly one free Saturday. Every DIY list you’ve read says to “build a floating desk” as if you already know how. None of them say what to buy, how long it takes, or what can go wrong.
This one does. Each of the 18 projects below lists the materials, the key steps, a realistic time, and a rough cost. Every project fits a rental, either because it comes off cleanly or because it uses only a few small holes that a landlord can approve. Start with the easy ones if you’ve never held a stud finder.

What Makes a DIY Project Work in a Small Apartment
The best small-space projects share three traits. They are reversible, they take less than a day, and they use the wall or ceiling instead of floor space. Anything that fails one of those tests belongs in a house, not a rental.
A small toolkit covers nearly everything here: a tape measure, a level, a stud finder, a drill with a driver bit, painter’s tape, and an assortment of wall anchors. Expect to spend roughly $60 to $100 if you buy it all new. Costs and times in this post are planning estimates, so adjust for your region and your skill level.

Lease and Safety Checks Before You Drill
Read your lease for rules about nail holes and paint, then ask in writing before you start. Many landlords accept small holes. Fewer accept paint, and almost none accept removed cabinets.
If your building went up before 1978, treat painted walls with care. The EPA’s guidance for do-it-yourselfers working in pre-1978 homes warns that sanding, scraping, and drilling can create dangerous lead dust. It advises assuming lead paint is present if you can’t confirm the building’s age. Mist the spot before drilling, catch the dust, and wipe it up with a damp cloth. Skip dry sanding on old paint entirely.
DIY Removable Accent Wall (Paint or Fabric Panels)
The fabric-and-starch method gives you a pattern without paint. Cut lightweight cotton 3 to 4 inches taller than your wall. Pour liquid starch into a tray, soak the fabric, wring it lightly, and smooth it onto the wall from the top with a roller. Trim at the baseboard with a sharp blade. It peels off later, sometimes with a little water.
You’ll need: about 8 yards of 44-inch cotton for a 10-foot-wide wall, liquid starch, a roller, and a utility knife. Time and cost: 2 to 3 hours and roughly $40 to $90. Test a patch behind furniture first, since textured walls can pull the starch unevenly.

Floating Shelf Styling Using Basic Wood Planks
A pine board makes a convincing shelf. Cut a 1-by-8 to 36 inches, sand it through 120 and 220 grit, then stain and seal it. Mount hidden floating-shelf brackets into wall studs, which usually sit 16 inches apart in US apartments. Slide the board over the brackets and secure it from underneath.
You’ll need: a pine board, floating-shelf brackets, stain, sealer, and a stud finder. Time and cost: about 2 hours and $20 to $45 per shelf. Skip drywall anchors for anything heavier than a few small decor pieces.

DIY Gallery Wall with Printable Art
Download art you like, then print it at a photo kiosk or print shop. Choose two frame sizes only, such as 8-by-10 and 11-by-14, in one finish. Trace each frame onto paper, cut out the shapes, and tape them to the wall in your layout. Leave about 2 inches between frames. Swap the paper for the real frames, using adhesive strips rated for their weight.
You’ll need: prints, matching frames, paper, painter’s tape, and rated strips. Time and cost: 1 to 2 hours and about $60 to $120 for six.

Peel-and-Stick Wallpaper Projects
If your lease worries you, apply the wallpaper to a panel instead of the wall. Cut a sheet of 1/4-inch plywood or hardboard to about 60 inches wide, wrap it in wallpaper, and lean it behind the bed as a headboard. For a wall, start at the top corner and use a level to keep the first strip plumb. Smooth with a squeegee and trim at the ceiling.
You’ll need: wallpaper, a squeegee, a level, and a sharp blade. Time and cost: 2 to 4 hours and $75 to $180. Test a sample square on your wall for a week first.

DIY Mirror Wall for Light and Space
Collect three to five thrifted mirrors with frames you can unify. Sand each frame lightly, spray on a coat of primer, then add two thin coats of one color. Lay the mirrors on the floor to plan the arrangement, keeping about 2 inches between them. Hang each from studs or anchors rated for its weight. A 20-by-30-inch mirror can weigh well over 10 pounds, so check before relying on adhesive.
You’ll need: mirrors, spray primer and paint, and picture-hanging hardware. Time and cost: half a day and $40 to $120.

Handmade Cushion Covers for Instant Refresh
An envelope cover needs no zipper. For an 18-inch insert, cut one front piece at 19 by 19 inches. Cut two back pieces at 19 by 13 inches. Hem one long edge of each back piece, then lay them over the front, right sides together, so the hemmed edges overlap by about 7 inches. Sew around all four sides, then turn it right side out. No sewing machine? Iron-on hem tape works.
You’ll need: half a yard of fabric per cover and thread or hem tape. Time and cost: 45 minutes and $5 to $12 per cover.

Wall-Mounted DIY Desk for Small Apartments
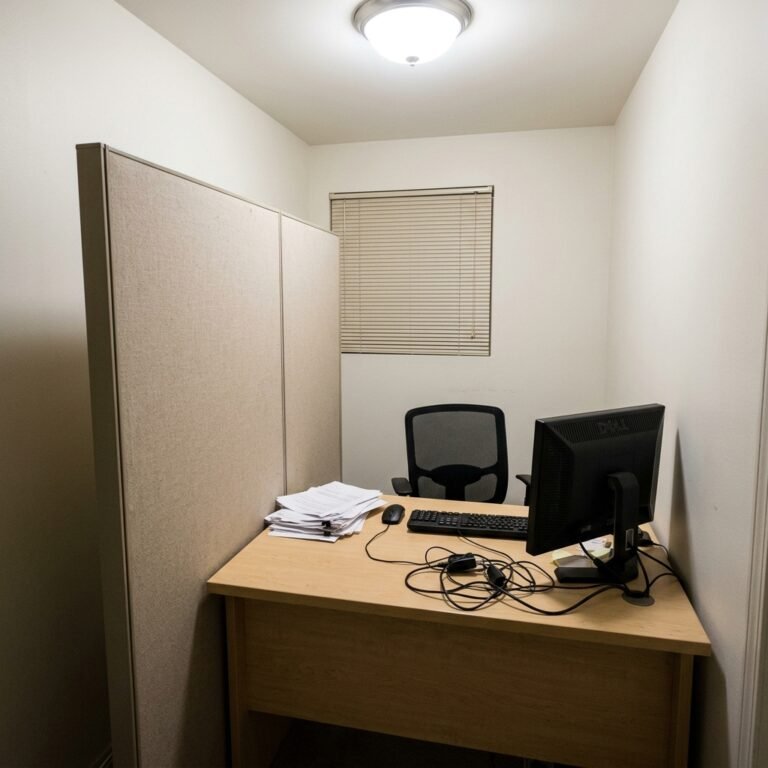
Use a 24-by-48-inch butcher block or a sanded and sealed plywood slab. Mark the desk height at about 29 inches from the floor, then find two studs. Screw heavy-duty brackets into the studs and set the board on top, securing it from below. Choose brackets rated well above the weight of a monitor and laptop. Setting up a work corner in a tight space can go wrong in other ways, so see the home office mistake that makes small spaces feel like a cubicle before you finalize the spot.
You’ll need: a board, two heavy-duty brackets, a stud finder, and screws. Time and cost: 2 to 3 hours and $70 to $150.

DIY Headboard Using Plywood or Fabric Panels
Cut 3/4-inch plywood to about 60 inches wide for a queen bed and 30 inches tall. Staple 2-inch high-density foam to the board, add a layer of batting, and stretch fabric over both, pulling it tight and stapling at the back. Corners are the tricky part, so fold them like a gift wrap. Bolt the finished headboard to the bed frame or lean it freestanding, so the wall stays untouched.
You’ll need: plywood, foam, batting, fabric, and a staple gun. Time and cost: half a day and $90 to $180.

DIY Entryway Organizer Using Hooks and Shelves
Cut a 1-by-4 pine board to 30 inches, sand it, and paint or stain it. Screw four hooks into it, spaced about 7 inches apart. Mount the board at 60 to 66 inches from the floor, screwing through the board into studs where you can. Add a narrow shelf about 10 inches above for a tray of keys. Hold the shelf level and pre-drill to avoid splitting the wood.
You’ll need: a pine board, four hooks, a small shelf, and screws. Time and cost: 1 to 2 hours and $25 to $50.

Handmade Planters for Indoor Greenery
For an easy start, paint plain terra-cotta pots with chalk-style paint and seal them. For a concrete planter, nest a smaller plastic container inside a larger one, pour quick-set concrete mix between them, and let it cure for 24 to 48 hours. Wear a dust mask and gloves when mixing, since the dust irritates lungs. Add a drainage saucer for every pot, because leaks mean lost deposits.
You’ll need: pots or concrete mix, containers, paint, and a saucer. Time and cost: an afternoon plus curing, and $10 to $30 per planter.

DIY Under-Bed Storage with Fabric Boxes
Measure the gap beneath your bed first. Most frames leave 7 to 18 inches. If yours is tight, add bed risers of 4 to 6 inches. Wrap sturdy cardboard boxes in fabric with fabric glue, or buy flat bins and sew simple covers. Add casters or felt pads so each box slides out without scratching floors.
You’ll need: boxes or bins, fabric, glue, casters, and risers if needed. Time and cost: 2 hours and $40 to $100.

DIY Wall Sconces (Plug-In or Battery-Powered)
Skip wiring and choose a plug-in sconce with a certification mark such as UL on the cord and plug. Hang it with two screws into a stud or with anchors. Swap the stock shade for a linen one. Run the cord down the wall in a paintable cord cover so it doesn’t dangle. Battery puck lights with a remote work where there is no outlet nearby. Don’t hardwire anything in a rental unless a licensed electrician does it with your landlord’s permission.
You’ll need: a plug-in sconce, a replacement shade, and a cord cover. Time and cost: 1 hour and $30 to $70.

Decorative DIY Storage Baskets
Buy plain wire or wicker baskets, then line them. Cut a fabric rectangle to the basket’s base plus walls, hem the top edge, and add a drawstring or fold it over the rim. Swap flimsy handles for leather ones, attached with small screws or rivets. A lined basket keeps small items from snagging and hides what’s inside.
You’ll need: baskets, fabric, thread or hem tape, and leather handles. Time and cost: 1 hour and $15 to $40 each.

DIY Coffee Table Makeover
Sand a laminate or wood table lightly and apply a bonding primer. Paint two thin coats, letting each dry fully. For a lighter look, replace the base with hairpin legs, attaching mounting plates to the underside with screws. Legs of 14 to 16 inches suit most coffee table tops. Or cover the top with peel-and-stick wood veneer, smoothing out bubbles as you go.
You’ll need: sandpaper, primer, paint, and hairpin legs. Time and cost: a weekend and $40 to $100.

DIY Kitchen Open Shelving
Never remove cabinets in a rental. Instead, add planks to a bare wall section away from the stove. Cut 1-by-10 boards to length and mount them on 8-inch brackets screwed into studs. Place the first shelf about 18 inches above the counter. Seal the wood so splashes wipe off. Style it with plain dishes, grouped by color or material.
You’ll need: pine boards, brackets, sealer, and a drill. Time and cost: 2 to 3 hours and $40 to $90.

Handmade Wall Clocks or Sculptural Decor
A clock is the easiest build on this list. Cut or buy a 12- to 20-inch wood round and drill a hole in the center. Buy a quartz clock movement whose shaft is longer than your board’s thickness. Thread it through, attach the hands, and add a battery. Paint or stain the face first. For sculptural decor, a thrifted wooden bowl or tray hung on a screw does the same job.
You’ll need: a wood round, a clock kit, and paint or stain. Time and cost: 1 hour and $20 to $45.

DIY Fabric Curtains Hung High
Measure from where the rod will sit to the floor, then subtract half an inch. Add about 8 inches for the hem and header. Cut your linen to that length, buying widths that total about twice the window. Fold and press the hems with hem tape. Clip rings mean no sewn header. Mount the rod 4 to 6 inches above the frame, or a tension rod where drilling isn’t allowed.
You’ll need: linen, hem tape, clip rings, and a rod. Time and cost: 2 hours and $40 to $90 per pair.

DIY Declutter + Styling Reset
This one is free, and it makes every other project look better. Photograph each surface before you touch it, because a photo shows clutter your eye has stopped seeing. Clear the surface, then put back only what you use or love. Sort the rest into store, sell, or donate. Set a 20-minute timer per surface so it never swallows the whole weekend.
You’ll need: a phone, three boxes, and a timer. Time and cost: an afternoon and $0.

Final Thoughts: Pick One Project This Weekend
Start with the no-drill builds: cushion covers, a clock, a gallery wall, or the decluttering reset. Once you’ve found your studs and trust your level, move up to shelves and a desk. Build one project, live with it for a week, then choose the next.
If you would rather buy than build, our cheap small apartment decor ideas with real prices list the same kinds of upgrades ready-made. Save this post to Pinterest and pick your first project today.

1 comment